LambdaQueue quickstart guide
In this section we'll build a simple echo queue that will test that your integration with LambdaQueue works. This will get you a skeleton you can use to build your async application.
Step 1 - Generate Access Keys
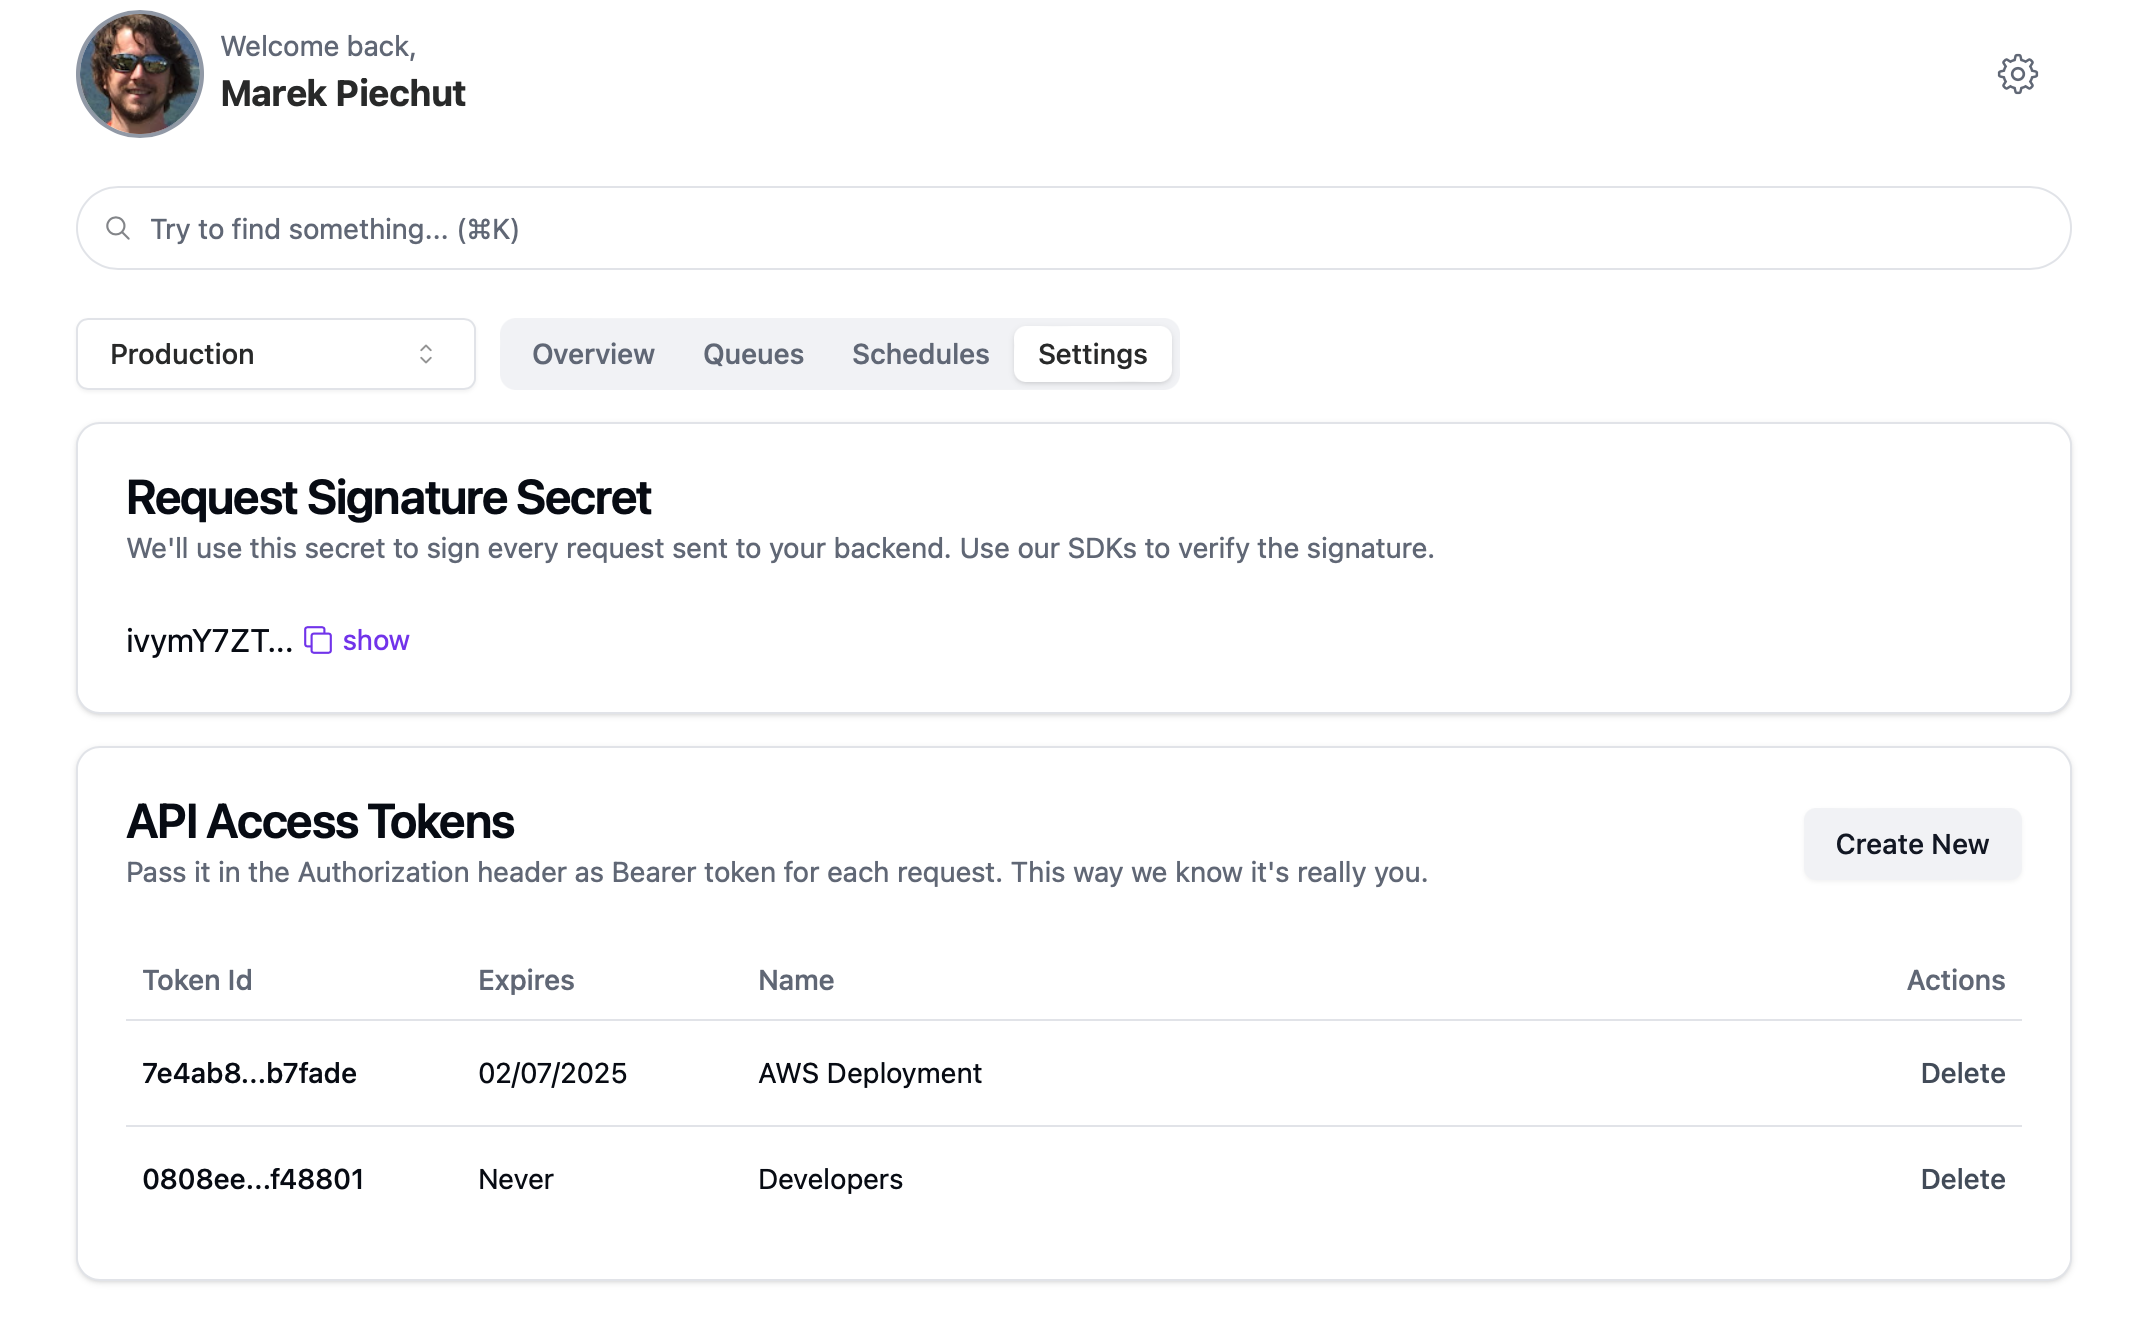
First thing we need it to get two security keys:
- signature secret - LambdaQueue uses it to sign all requests when calling your service. This way you're sure it's us, not some attacker calling your service. that)
- API token - You'll use it to authorize your calls to LambdaQueue API, this way we know that it's you that is really calling our APIs.
To get these just go to Settings section in admin UI. Signature secret should be generated for you. There can only be one for given environment. For API tokens, you are free to generate as many as you want. All will work until they expire or you delete them.
IMPORTANT
🚨Make sure you copy API key when it's generated. For security reasons you won't be able to see it again.

TIP
It's a good practice to have a separate API key for deployment environment, developers, system administrators, etc. This way you can delete leaked dev key without compromising your production.
Step 2 - Setup Env
There are 2 ways you can use generated keys in LambdaQueue - via configuration options when loading SDK or via env variables. We recommend you use second option: store your keys in env variables according to your framework/server documentation:
LQ_SECRET=_signature_secret_
LQ_TOKEN=_api_token_
LQ_BASE_URL=_public_url_ #So LambdaQueue can connect your app
Step 3 - Add SDK for your framework
npm add @dayone-labs/lambda-queue-serverlessnpm add @dayone-labs/lambda-queue-connectStep 4 - Create a simple echo queue
import { queue } from '@dayone-labs/lambda-queue-serverless'

export const welcomeQueue = queue(
  '/welcome-queue', //Pass route that it will be served at❗
  async (job: { name: string }) => {
    return { message: `Hello, ${name}` }
  }
)

//Queue is a route handler, just expose it as POST
export const POST = welcomeQueue
//Remember to expose HEAD so we can validate endpoint
export const HEAD = welcomeQueue

//Push to queue anywhere in your code
await welcomeQueue.push({ name: 'Alfonso' })import lq from '@dayone-labs/lambda-queue-express'
import express from 'express'
const app = express()
const queue = lq.queue('/welcome-queue', async (event: { name: string }) => {
return { message: `Hello, ${name} ` }
})
app.use(queue)
app.use(express.json())
//Push to queue anywhere in your code
await queue.push({ name: 'Alfonso' })WARNING
🙋♂️ Move queue to separate file and import it in your route handler if you're on Vercel and you get "does not match the required types of a Next.js Route." error
Step 5 - Item processed
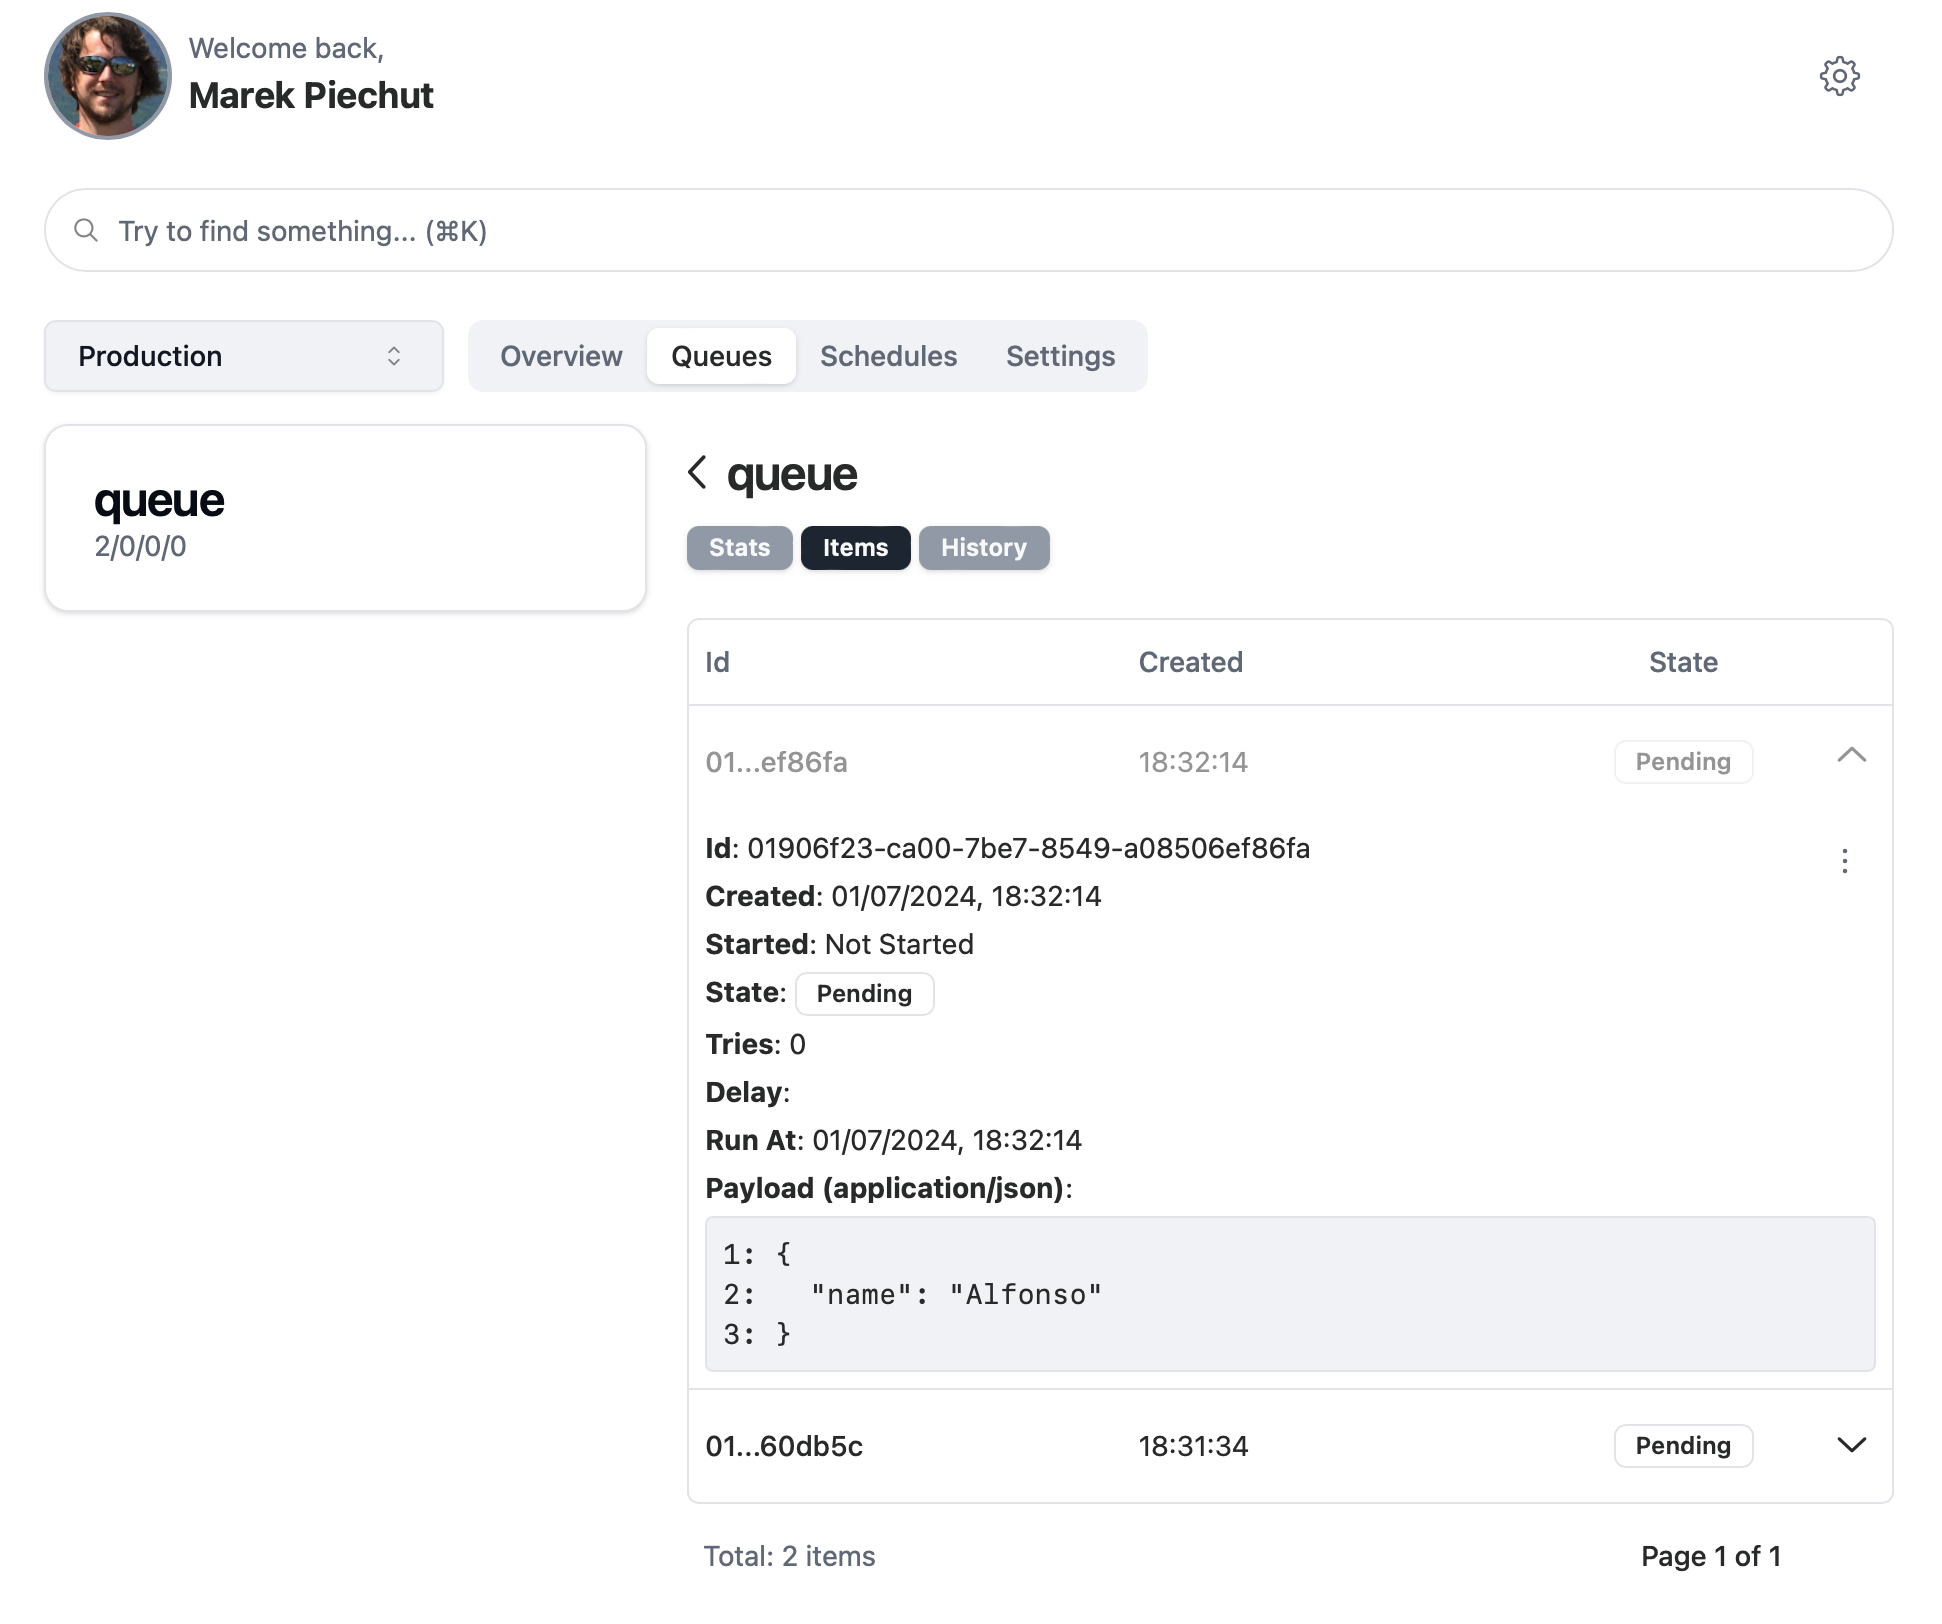
After pushing to queue, if you're quick, you can check in Admin UI that your item was queued for processing.

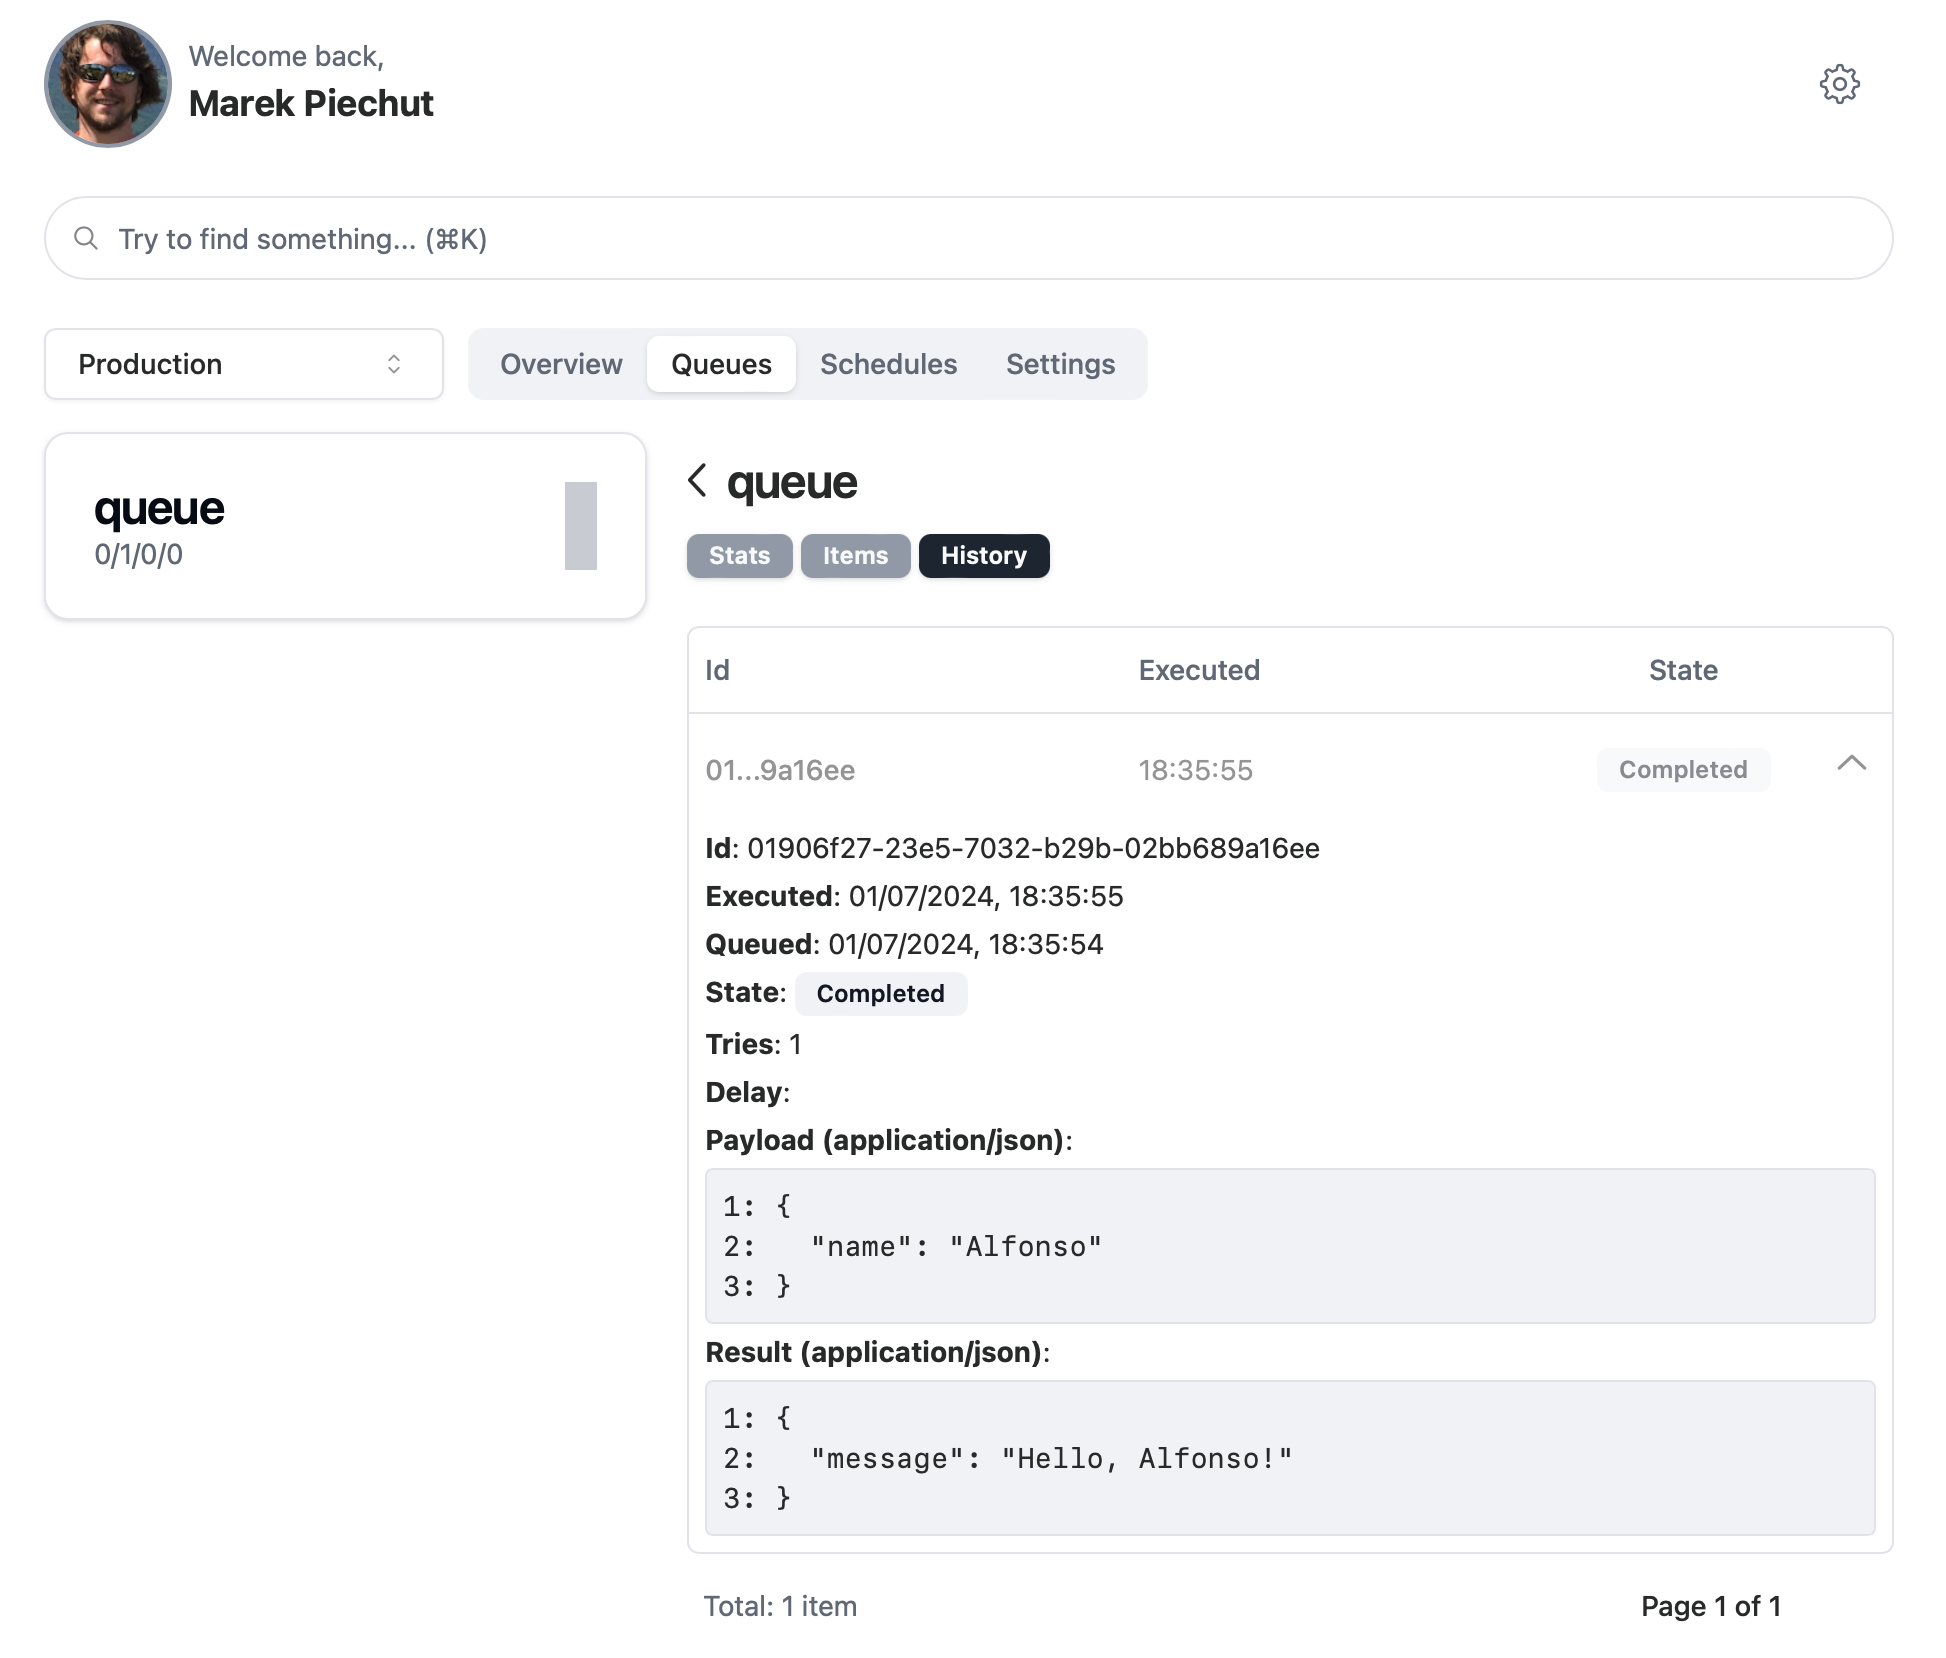
After few seconds, LambdaQueue servers will pick up the task and process it. Afterwards it will be visible in queue history, with value you have returned from your service displayed in "Result" section.

The End
Feel free to play with the code. Use other queues, do some asynchronous processing, return an error or some other payload. You can also check out Examples section for if you want to get some ideas how you can use LambdaQueue in your code.
